
First of all, this will require sewing but it's so basic that i don't really count it. If you don't want to sew you can also skip that step because it's for the decoration and not the basic project. Ok, now a little story lol. I got this little square... thingy lol (i don't even know the name of it in spanish!) but you can sit on it and store stuff inside. I love it! I keep all my sneakers inside and i've saved a lot of space. But the thing is that my cat also loves it for sleeping and scratching. To prevent him from destroying it i created this little project that can be used to cover any furniture you would like to protect or that you simply don't like the colour of it. You can also read and add to your favorites this project here in my Cut Out + Keep account.
What we'll need:
 Fabric (i used a 32x70 cms piece) Fabric glue (there're a lot of glues that work on fabric just choose your favorite) Pen, ruler and scissors Iron 10 Beads 10 Head pins 10 Jump rings Needle and thread 2 Pliers
Measures and quantities are based on the ones i used. Feel free to change them depending on your needs.
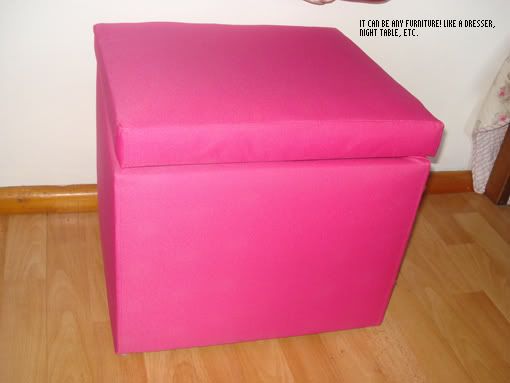
01. Choose the piece of furniture you would like to make the cover to. Measure it and choose the size. Mine was 32x70 cms.
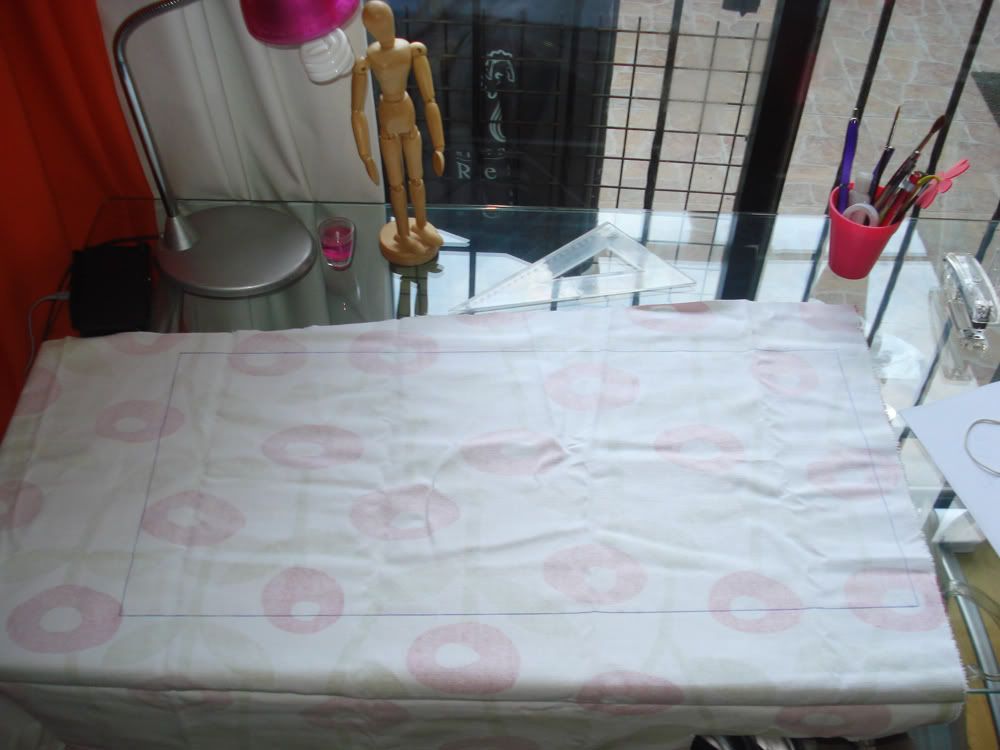
02. Trace your cover on the fabric.
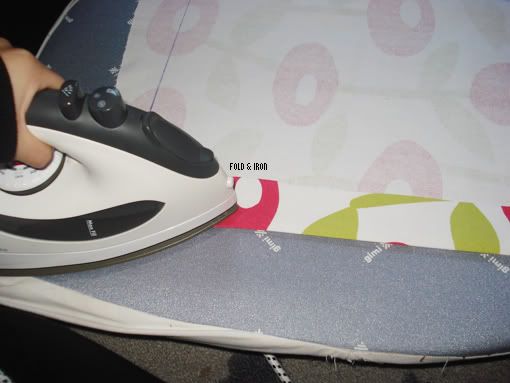
03. Iron the fabric through the lines you drew so that you have a nice and clean fold.
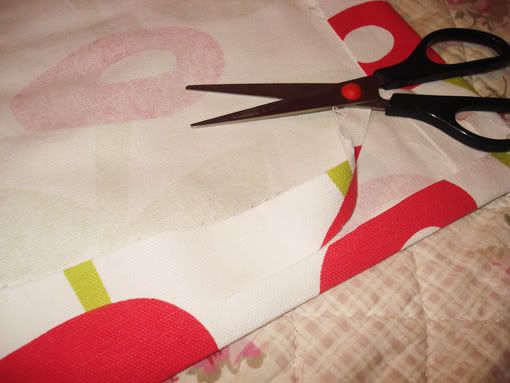
04. Cut the excess of fabric.
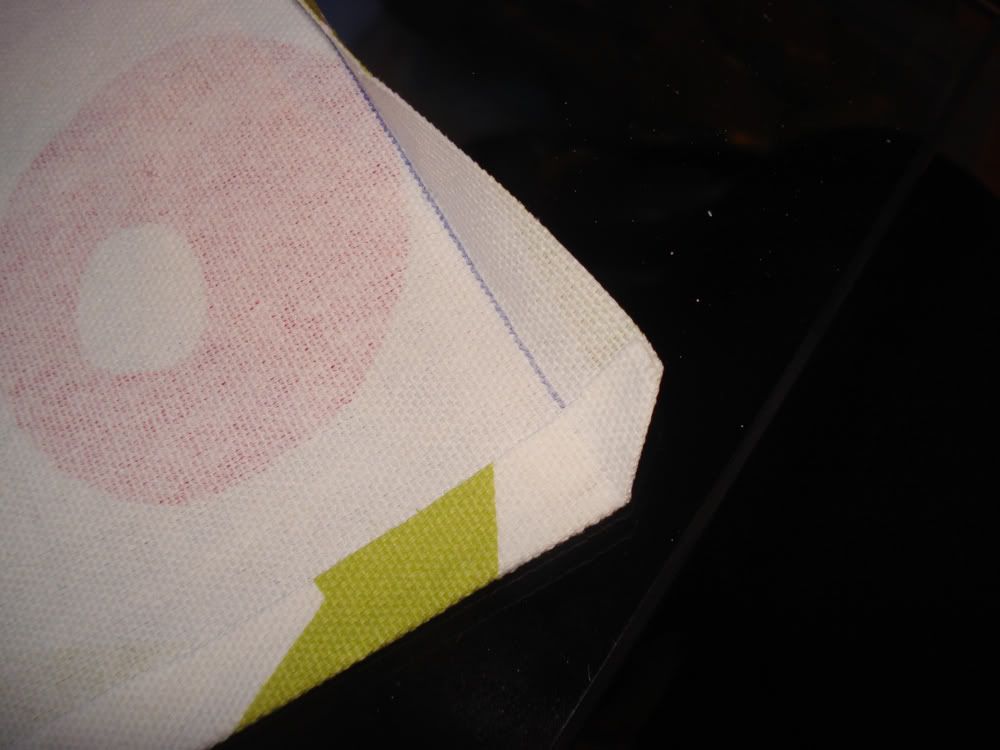
05. Cut a little triangle on each corner so that when you glue everything there's not a clump of fabric there.
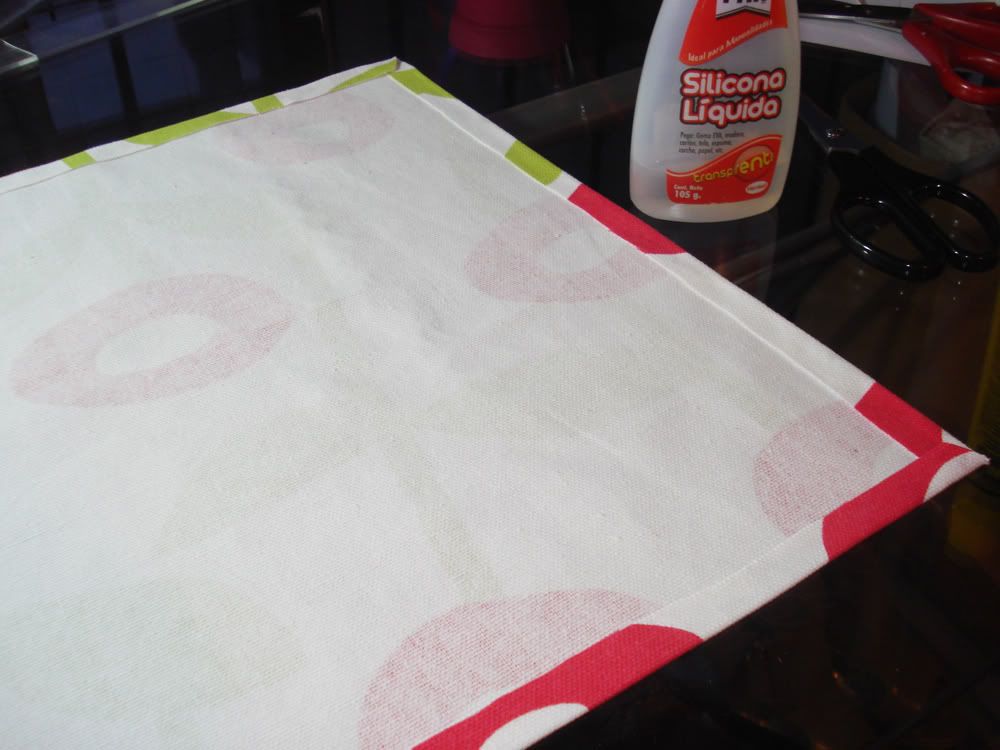
06. Glue everything! If your fabric isn't very thick make sure you don't add too much glue.

07. After folding everything leave it to dry.
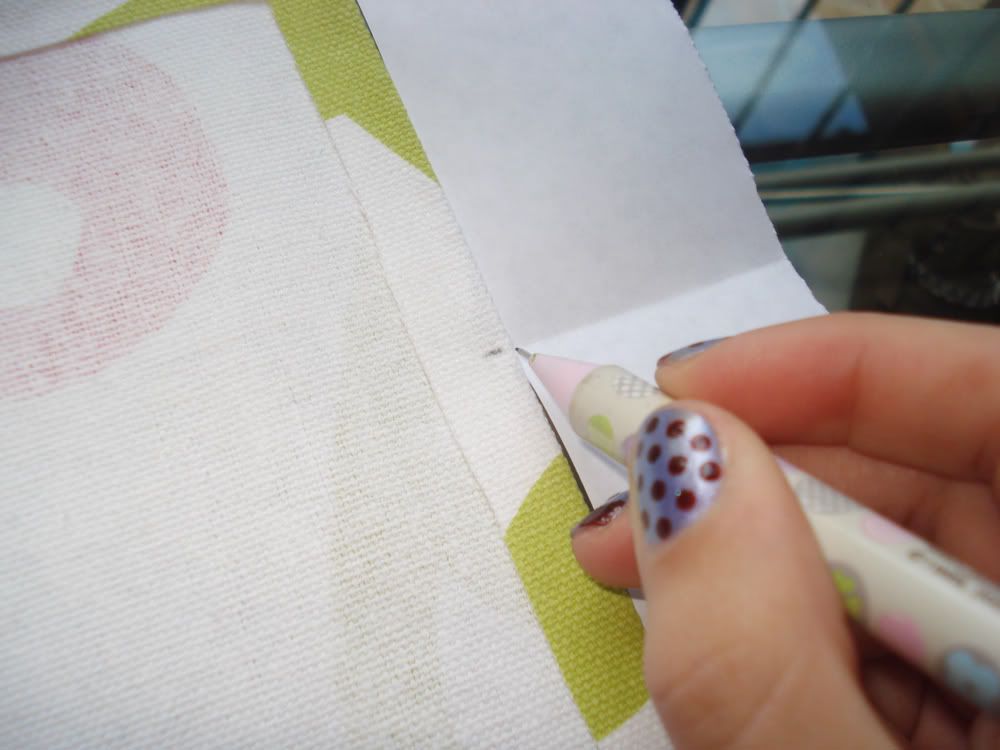
08. Cut a piece of paper of the exact meaure as one of the sides (mine was of 32cm). Fold it a couple of times till you have the number of decorations you want. By doing this all of the beads will be at the same distance from one to another (yeah, i could just measure it and divide and all that stuff but math is my worst enemy).

09. Mark the folds of the paper on the fabric so that you know where to sew the decorations later.
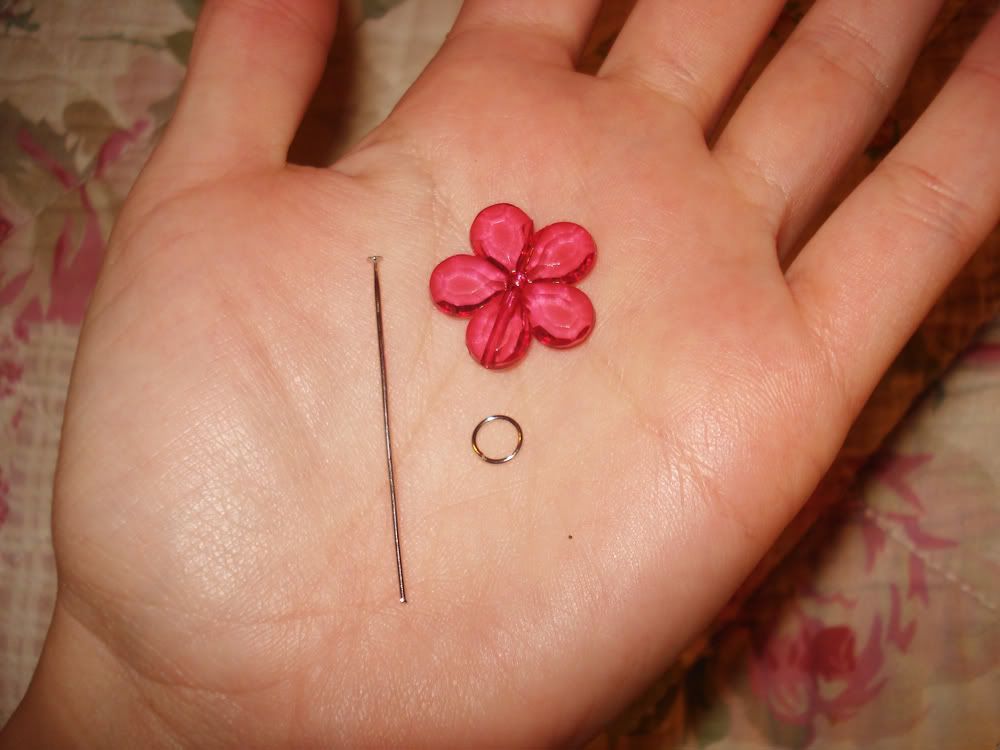
10. This is what we'll need to make the decorations: beads, head pins and jump rings.
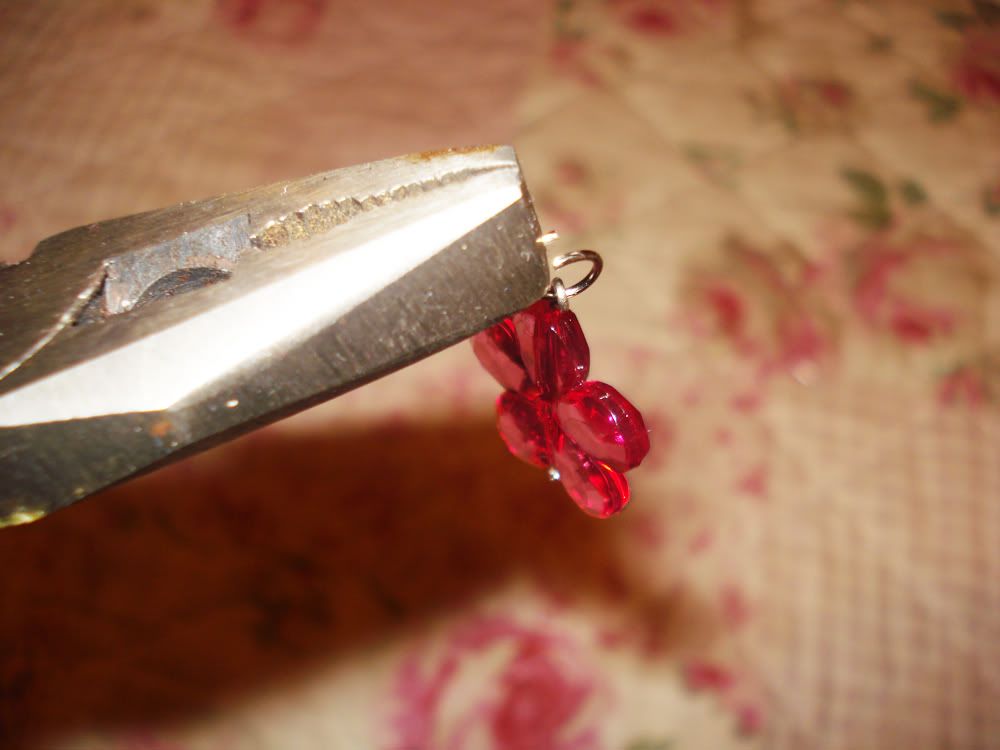
11. Introduce the head pin into the bead and make a loop by helping you with the pliers. I'm no expert in doing this so i can't really explain it but here you have a video that makes it really easy to understand.
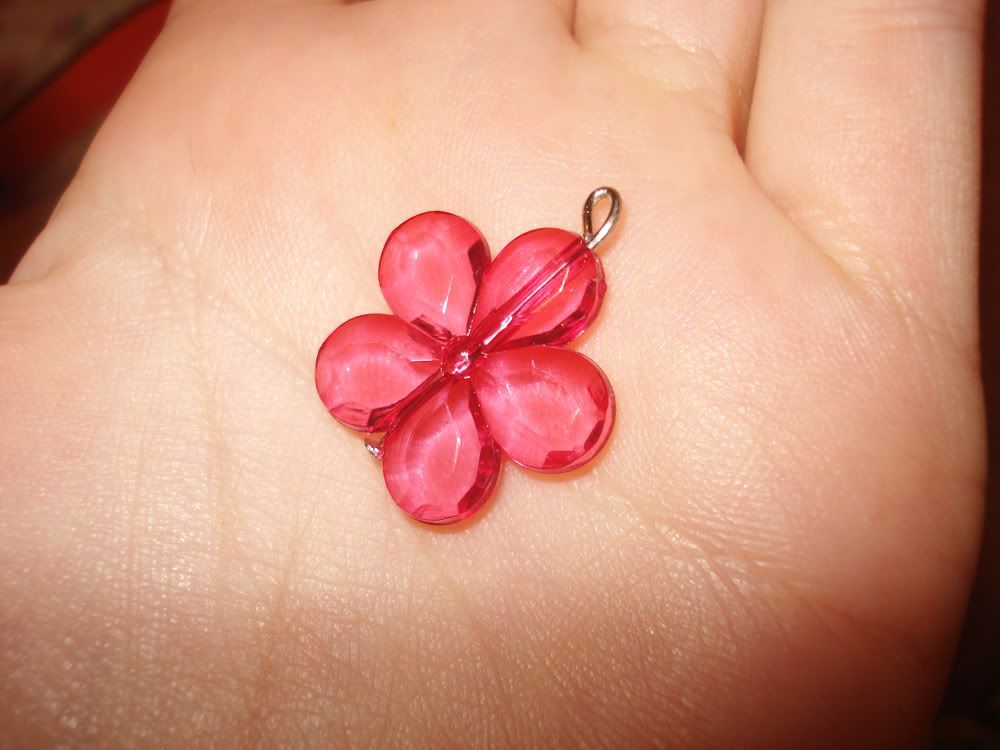
12. Open one of the jump rings (watch this if you need tips), pass the loop inside of it and close.
13. Repeat steps 11 and 12 till you have all the beads ready to sew.

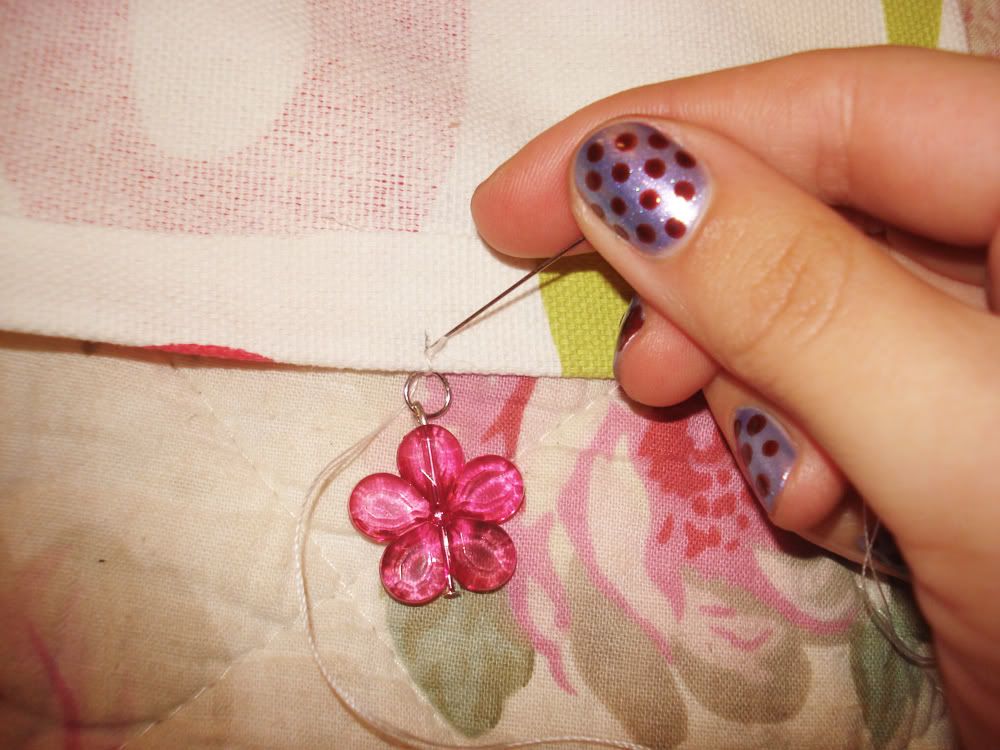
14. Sew the jump rings exactly where you drew the marks on the fabric.
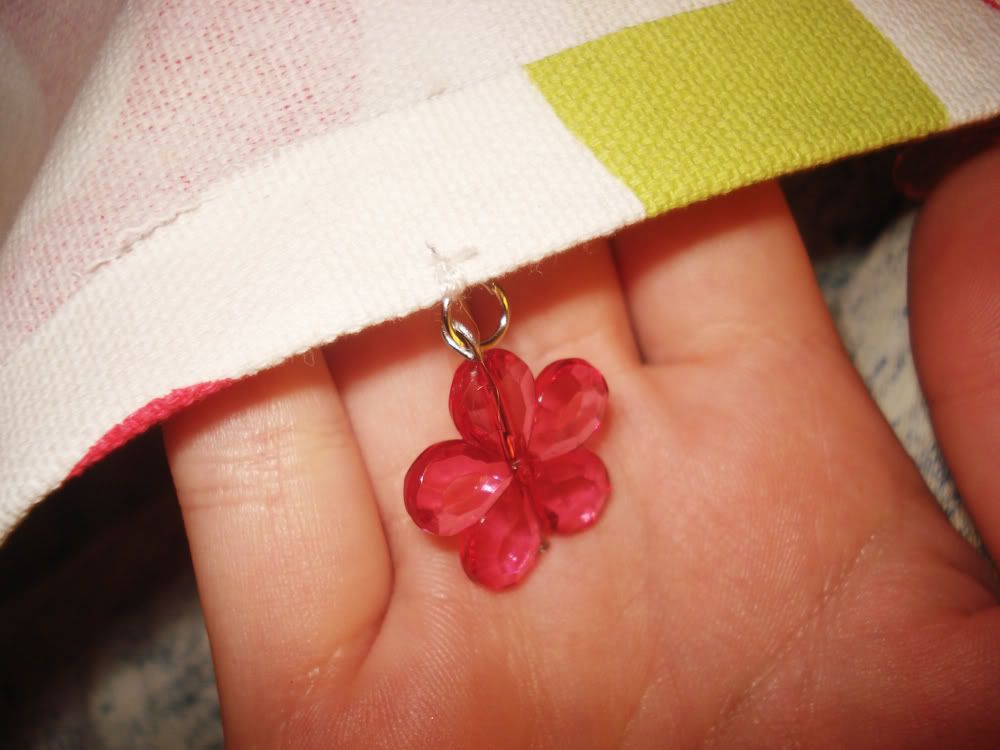
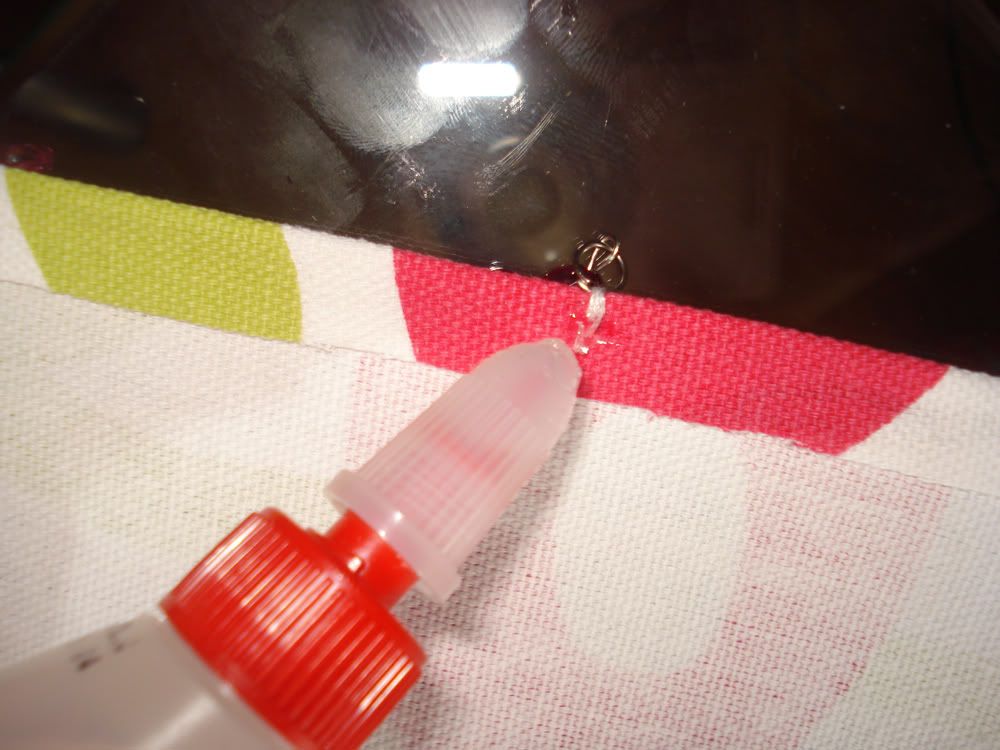
15. If you want, glue the back of the stitches so that they won't come off so easily. Let the glue dry.
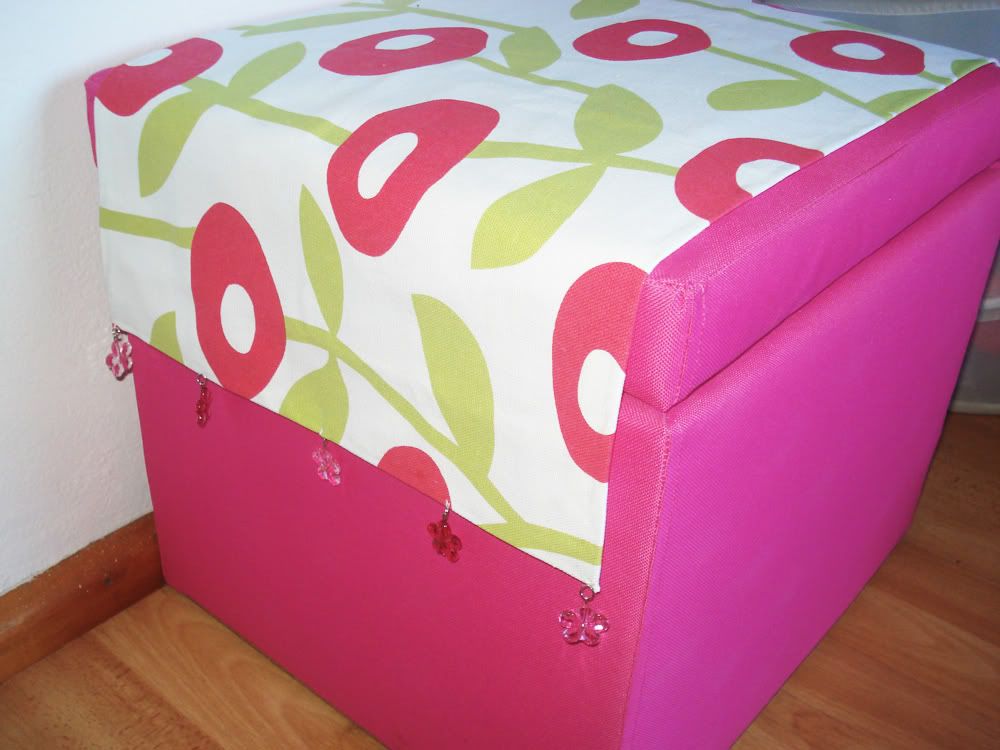
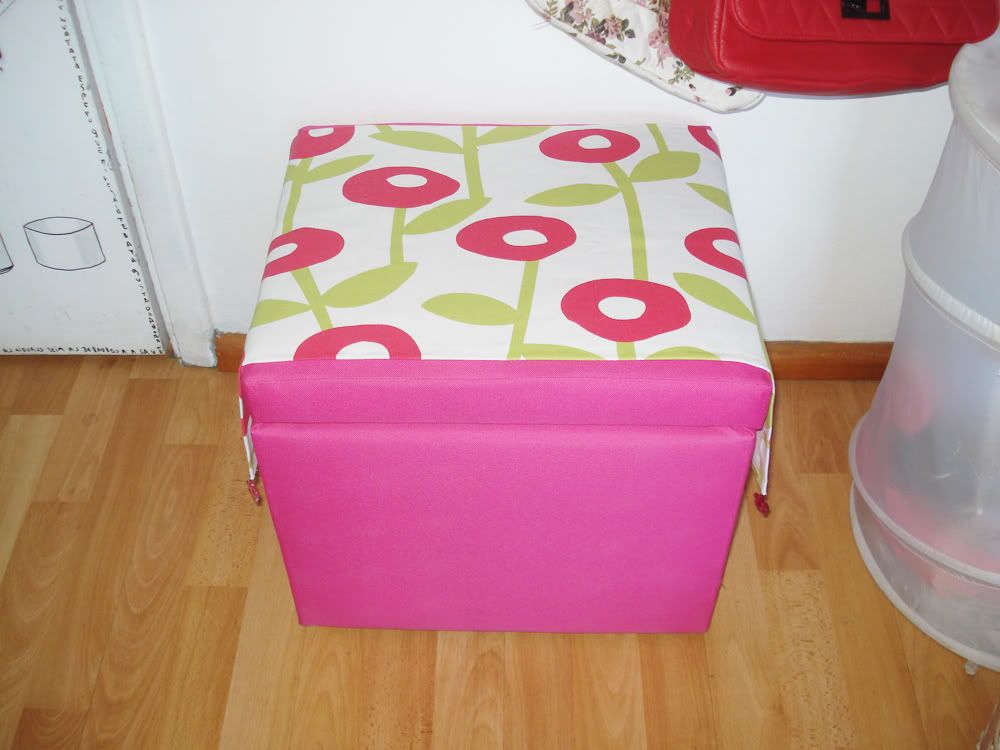
16. Iron your cover if you need and put it on top of your furniture. And you're done! :D
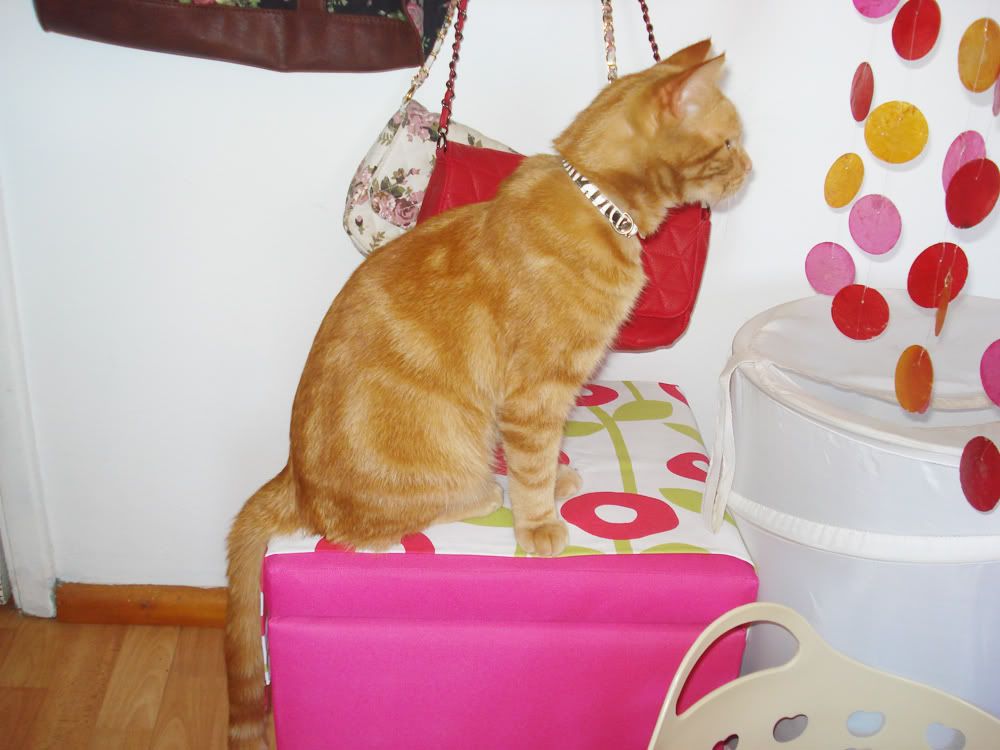
As you can see the little bastard already likes it lol. I know that these are a lot of steps but if you take the time to read them (or just by looking at the pictures) they're really easy. And i think that it's better to show everything rather than skipping parts. If you like it please try it and be creative! I liked it so much that i'll be doing it again specially for my night table (and adding a pocket so i don't loose my tv's remote). As always, feel free to ask me any questions you have in a comment here or in my formspring.
nice job!
ResponderEliminaryou have a really nice blog
!'m following now
would love you to follow me..
xx
Such a cute project! Thanks for the comment, I'm following!
ResponderEliminarxoMads
Madisontheresa.blogspot.com